Sunday, October 17, 2010

PFB #5 | Recipe Remix: Lavash Pizza Four Ways


Several years ago I attended the Monster.com user’s conference in Boston. This behemoth job board’s headquarters now resides in a redesigned textile mill in Maynard Massachusetts. It was a three day event where the participants attended informative seminars along with providing feedback to enhance the user experience and Monster wined and dined its clients.

You are probably wondering, what does this have to do with pizza? For this event, my husband and I stayed at The Westin Copley Place in downtown Boston and one evening we had drinks and appetizers at Bar 10. We ordered the Margherita Pizza with cured tomatoes, pesto and fresh mozzarella. This was not the typical pizza; it was a grilled flatbread pizza which had a super thin, crispy crust that was to die for.


Within a few days of returning home, I set out on a quest to recreate this pizza. My first inclination was to investigate at the grocery store for the flat bread. Instead I discovered lavash bread at my local Trader Joe’s. Lavash is a soft, thin flatbread. It is commonly known as lahvash or cracker bread and is typical in Iran, Armenia and Azerbaijan. It is simple bread made of flour, water and salt and rolled very thin. Traditionally the dough is rolled out flat and slapped against the hot walls of a wood oven or tandoor. This method is still utilized in Azerbaijan, Iran and the United States.


By 997 in the medieval times, pizza made an appearance on the “culinary” scene and during the 16th century in Naples, flatbread was referred to as pizza. One of the most infamous pizzas is the Margherita which was made to honor the Queen consort of Italy by replicating the Italian flag by garnishing the pizza with tomatoes, mozzarella and basil. Pizza landed in the United States with the arrival of Italian immigrants in the late 19th century in cities with large Italian populations such as San Francisco, Chicago, New York City and Philadelphia. Still today, these cities are renowned for pizza, from thin crust to deep dish pizza.

It has now become tradition in our household that when I make homemade pizza, it is on lavash bread. This crust is thin, crispy and accommodates most every topping and creates a handheld masterpiece. Speaking of toppings, where do I begin? The choices are endless, illuminating and exciting. I often think of new ways to top this perfect platform for pizza. I must admit that pizza Margherita is probably the quintessential traditional pizza with a perfect balance of flavors.

For this challenge, the remaining 72 contestants are asked to put our spin on the same recipe: Pizza. We are given free reign to share our own ideas. Do we try out molecular gastronomy technique? Share a super secret trick? Or re-envision the dish from a different perspective? I wanted to stay authentic to who I am and what I love to make, so Lavash pizza done four ways was my choice for this challenge.


If you are looking for a great entertaining tip – host a “Create Your Own Pizza Party". Cut each lavash sheet into four pieces, set out your favorite toppings and beverages then let your guests get creative. You can host in your kitchen, where typically everyone gathers. Set out plates, napkins and forks along with an area for your guests to prepare their individual pizza creations. Perhaps even have a contest for the most creative pizza. Let your imagination run free.

I have just began to touch the tip of the iceberg with the following four recipes for lavash pizza. Each recipe below is designed for four individual pizzas, by slicing each sheet of lavash bread into four equal pieces. Each pizza will measure approximately 4 by 6 inches and the various combinations are endless. Please sit back and enjoy my four ideas for lavash pizza.


Fresh Figs, Fig Jam, Prosciutto and Blue Cheese Pizza

1 Sheet lavash bread, cut into four equal pieces
6 Fresh figs, cut off stem and cut into quarters
4 to 6 T. Fig Jam
4 to 6 T. Fresh Ricotta
4 slices of prosciutto, julienne slices
4 T. Blue cheese, crumbles

Divide the ricotta cheese among the four pieces of lavash bread and spread evenly to almost the edge. Top each one with about one tablespoon of fig jam and spread. Then top each pizza with six pieces of the fresh fig and top with the prosciutto evenly among the pizzas. Finally, sprinkle with the crumbled blue cheese. Lie onto a cookie sheet and bake at 400 degrees for 10 minutes.


Cherry Tomato, Fresh Pesto and Quattro Formaggio

1 Sheet lavash bread, cut into four equal pieces
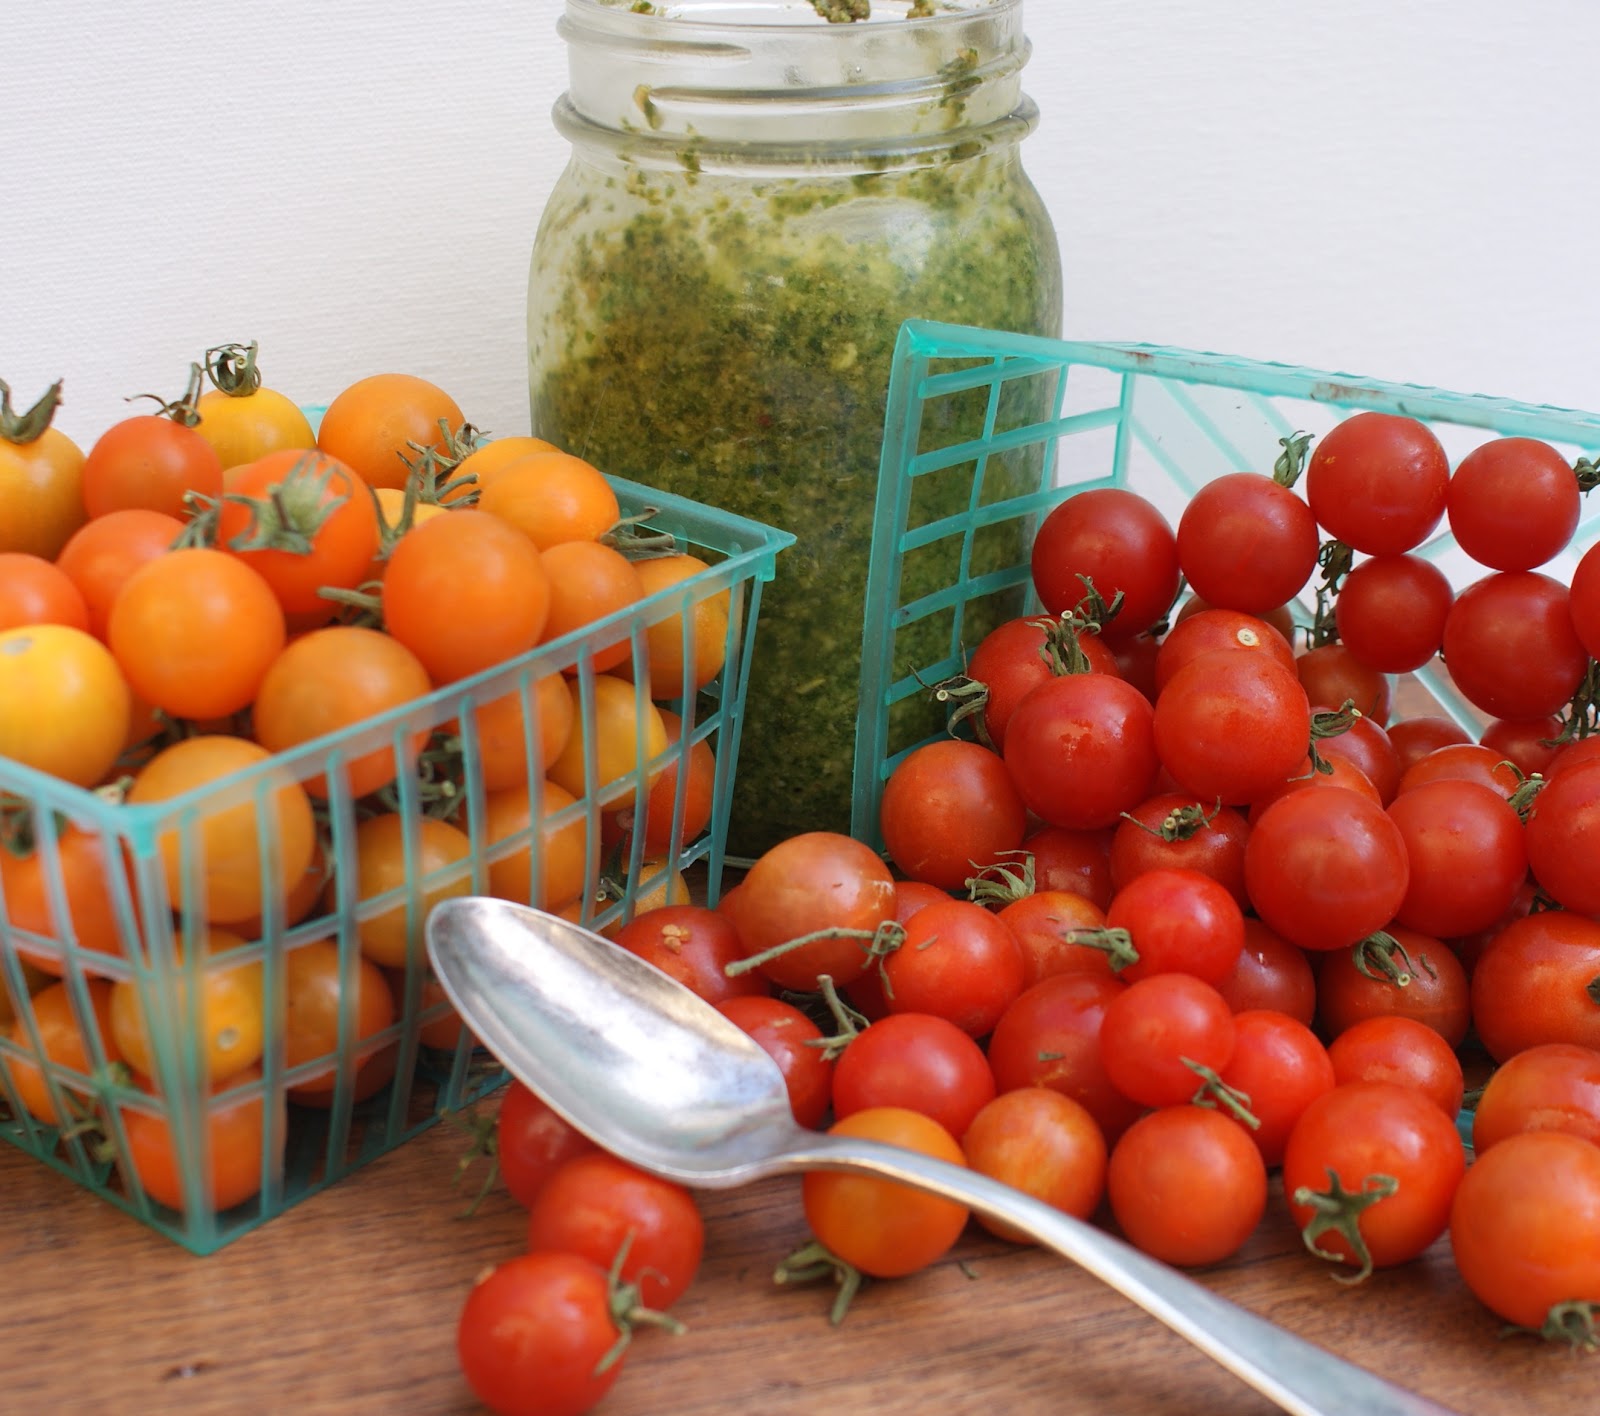
4 to 6 T. Pesto (handmade or purchased)
20 Small cherry tomatoes cut in half
1 C. Quattro Formaggio Cheese Blend*
4 to 8 Fresh basil leaves, julienned


Spread the pesto among the four pieces of lavash bread and spread evenly to almost the edge. Divide and sprinkle the Quattro Formaggio cheese blend on each slice, then top each one with 8 tomato halves. Lie onto a cookie sheet and bake at 400 degrees for 10 minutes. Immediately sprinkle with the fresh basil leaves and serve.

*The Quattro Formaggio cheese blend is from Trader Joes. It is a blend of Asiago, Fontina, Parmesan and Mild Provolone Cheese.


Wild Mushroom, Goat Cheese, Fresh Thyme Pizza with Truffle Oil

1 Sheet lavash bread, cut into four equal pieces
4 C. Assorted fresh wild mushrooms, cleaned and cut into pieces
2 Shallots, peeled and sliced thin
3 T. Butter
Salt and Pepper
4 to 6 T. Ricotta cheese
4 to 5 T. Goat cheese
4 to 6 t. Fresh thyme leaves
Truffle oil


In a medium skillet, melt the butter and add the sliced shallots then add the wild mushrooms. Cook on medium high heat until golden brown. Season with salt and pepper to taste. Set aside.

Divide the ricotta cheese among the four pieces of lavash bread and spread evenly to almost the edge. Divide and spread the mushroom mixture among the pizzas. Add the goat cheese to each pizza by strategically placing small pieces on each one. Lie onto a cookie sheet and bake at 400 degrees for 10 minutes. Immediately sprinkle with the fresh thyme and drizzle desired amount of truffle oil on each one.


Fontina, Fresh Garlic and Arugula Pizza

1 Sheet lavash bread, cut into four equal pieces
1 C. Fontina cheese, shredded
4 to 6 T. Ricotta cheese
4 Garlic cloves, peeled and sliced thin
Dried thyme
Red pepper flakes
2 C. Arugula
Olive oil
Lemon


Divide the ricotta cheese among the four pieces of lavash bread and spread evenly to almost the edge. Divide and sprinkle the fontina cheese among the pizzas. Place the garlic slices among each of the pizzas and sprinkle with a pinch of dried thyme and a pinch of the dried red pepper flakes. Lie onto a cookie sheet and bake at 400 degrees for 10 minutes. While cooking, lightly toss a bit of olive oil and lemon juice on the arugula. When the pizza is done cooking, dress each pizza with the arugula salad on top.

It is hard to believe that challenge #5 marks the halfway point of this exciting contest. I would like to take this opportunity to pay homage and express to each of YOU the appreciation for your support through this exciting journey. I would like to especially thank my darling husband Charles for his support, patience and understanding.

The voting will open at 6AM Pacific Time October 18th through 6PM Pacific Time October 21st. 60 Winners will be announced at 12 PM Pacific Time on October 22nd. Good luck to each of the wonderful contestants!


Tuesday, October 12, 2010

Caramel Rice Krispie Treats


Some foods just jolt you like a lightening bolt back to your childhood. Rice Krispie treats drop me back in time to being a kid. It is such a simple dessert yet so incredibly satisfying. Not sure if it is the crunch or the sweetness from the marshmallow – perhaps it is the combination. Indeed – the combination is the key!

Last week, I was strolling through the breakfast cereal aisle at Safeway – there it was – a large box of Rice Krispie cereal. Instantly the nostalgic thought of being a kid was dancing through my head – I had to make the classic treat. I wanted to put my own spin, so I added some homemade caramel that I had in the refrigerator. The addition of the rich caramel gave this treat an adult flair. In addition, I increased the marshmallows to add to the gooey greatness that resonates with this timeless treat.

I want to take a minute to thank each of you who have supported throughout the Project Food Blog contest thus far by casting your vote. Each of your comments, tweets and personal messages mean so much to me. I hope you enjoyed my last entry for Challenge #4. I have always enjoyed making homemade gnocchi and it was fun to share with all of you.

Voting now open: You have until 6PM Pacific Time, Thursday, October 14th to cast your vote by clicking here, or clicking on the widget to the right. Thank you!!

Caramel Rice Krispie Treats

3 T. Butter
12 oz. (about 50) regular marshmallows
7 C. Rice Krispies Cereal
½ C. Caramel Sauce (recipe below)

In a large pot, heat the butter over low heat. Add the marshmallow and stir until completely melted. Then add the caramel sauce and blend together. Take off the heat. Add the Rice Krispie cereal and stir well until well coated.

Use a lightly buttered spatula or small plastic sandwich bag, evenly press mixture into a 13 x 9 x2-inch pan coated with cooking spray. Let cool and cut into 2-inch squares. Best served the same day or keep in an air tight container for up to two days.

(Adapted from the original Rice Krispie Treat recipe)

Caramel Sauce

1 ½ cup sugar
¼ C. water
½ t. lemon juice
1 cup heavy cream

Stir sugar, water and lemon juice in a large saucepan over medium heat until the sugar dissolves. Increase the heat; boil without stirring until the mixture turns deep amber brown. This should take about 9 minutes. Take off the stove and hold over the sink before pouring the cream mixture into the sugar mixture. It will boil and bubble. Once calmed down, add to back to the burner and reduce slightly over medium low heat for about 8 minutes. Chill until thickened. Put into another container and slightly heat when ready to use.


Sunday, October 10, 2010

PFB #4 | Handmade Gnocchi with Basil Pesto Sauce


A sincere thank you to each of you who took the time to vote for me and helped me secure a place in round four of the Project Food Blog contest. Speaking of the next challenge, the title is “Picture Perfect” where we are asked to go above and use photography to create a step-by-step, instructional photo tutorial. When contemplating this challenge, the first thing that came to mind was Gnocchi. Not sure why, but as they say go with your gut. To accompany this potato pillow, a hand crafted basil pesto was an ideal companion.

Please repeat after me: gnocchi (n'YOH key). Gnocchi means “lumps”, and may be derived from nocchio, a knot in the wood or nocca (knuckle). It is a traditional Italian pasta type of probably Middle Eastern origin since Roman times. In Roman times, gnocchi were made from semolina dough mixed with eggs. The use of potato in gnocchi became more common after the introduction of the potato to Europe in the 16th century.

Today gnocchi is made from a variety of ingredients ranging from ricotta, pumpkin, and spinach to a whole host of other inventive ingredients. Thursday is traditionally gnocchi day in Italy. If you're visiting Italy on a Thursday but don't want to stand out as a tourist in local restaurants, order gnocchi, because all the locals do! When in Italy...


There is a definite art to making gnocchi. It takes practice, patience and persistence. The epitome of superior potato gnocchi is when it has a light, pillow almost cloud like texture. The texture is so sublime that you are moved to another level of eating enjoyment when having these delightful bites of heaven.

On the other end of the spectrum, the worst gnocchi are dense, gummy, rubbery or even soggy. They key to making the ultimate gnocchi is to bake the potatoes and use a potato ricer to develop the lightness. In addition, do not over work the dough or use a food processor, using your hands are the best tools to mastering this Italian classic.


{Baked potatoes }

Making gnocchi for me is quite therapeutic and relaxing - from running the baked potatoes through the ricer, kneading the dough to cutting into small pieces to form the snake shaped logs. The fun part commences when you quickly roll the small pillows over the wooden gnocchi board or use the tine of a fork. The traditional gnocchi takes shape and a sense of accomplishment is obtained. I use semolina instead of traditional flour for my wooden board and storing these little gems. It tends to not get gummy from any moisture and prevents any sticking together.


{Whole nutmeg }

One of my favorite matches to the time-honored gnocchi is a handmade basil pesto. The fresh fragrant basil along with earthy pine nuts or in Italian they are called “pinoli”, along with freshly grated parmesan cheese are the backbone to this delicious sauce. With the addition of garlic and good olive oil the sauce is complete and often easily made in a food processor. A good tip is to make large batches of the pesto and freeze in small containers to enjoy year round.

Once you master the art of gnocchi making, you will never purchase from your local grocery store again. It is relatively simple and will impress your guests.  Classic elegance yet easy!

Potato Gnocchi

2 lbs. Russet Potatoes
1 Egg
1 C. Flour + extra if needed
½ t. Fresh nutmeg
1 t. Salt
6 Grinds fresh ground pepper (used multicolored pepper)
Semolina flour

Wash potatoes and dry. Poke each potato with a sharp fork multiple times on both sides to prevent any explosion. Place into a microwave on the rack and cook for about 15 minutes until soft. You can also bake in the oven for one hour at 350 if you prefer.


Let cool for five minutes. Cut each potato in half and scoop into a ricer and process into a large bowl.  Add the egg and fresh nutmeg along with the salt and pepper. Then add about one cup of flour. Use your hands to mix the dough together until it forms a ball. Press it flat and divide into three portions. Shape each one to form a rectangle. Cut into 5 or 6 pieces. Spread some semolina flour onto a wooden board. Proceed to roll the pieces into a snake shape. Start in the middle and gently roll until the log is about one inch thick. Use a sharp knife to cut small pieces about one inch wide. Continue to follow this process until the dough is gone.


Once you have the small pieces, use the wooden gnocchi board to give the pillow their signature look. Simply pick up a piece and place onto the board and press gently and roll and place onto a sheet pan with sides which is sprinkled with semolina flour. Continue to form and mark the little gnocchi bites until they are gone.

To cook, use a large pot of well salted water that has come to a boil. Gently drop the desired amount of gnocchi into the pot, without over crowding. Reduce the heat to medium high, and cook until they float to the top or about 3 to 4 minutes. Remove with a strainer into a large bowl that is heat resistance. Coat with a bit of olive oil to prevent sticking. If you are making a large batch, you can keep in a 300 degree oven until you have cooked the desired amount. Toss with your favorite sauce and serve.


Basil Pesto Sauce

2 C. Fresh basil leaves, packed tightly
½ C. Parmesan cheese, freshly grated
1/3 C. Pine nuts, toasted
½ C. Olive oil
3 Garlic cloves, smashed
Salt and pepper to taste


Use a food processor to make this sauce. Simply add the basil leaves, parmesan cheese, pine nuts and garlic cloves. Pulse for 10 seconds and then slowly pour the olive oil into the mixture while food processor is on. Continue to pulse until the mixture is smooth. Taste and then season with salt and pepper. Place into an airtight container immediately so the bright green color remains. Refrigerate until ready to use.


Above is the finished dish with beautiful "light as air" potato dumplings (aka - gnocchi) and the vivid basil pesto that glissens and has a lovely aromatic character.  I quickly roasted some grape tomatoes still on the vine to add a punch of color and flavor.
 
Thank you again for all of the loyal supporters - I truly appreciate each one of you.  Voting opens at 6AM pacific time October 11th through 6PM pacific time October 14th. 

Thursday, October 7, 2010

Apple and Fig Tart


I absolutely LOVE making tarts. They are simple, delicious and always impress your guests. The beauty is that they are a dessert that can be made ahead of time before a dinner party. One of the tricks to entertaining to have as much prepared ahead of time, so you can actually enjoy your own party. The more organized you are, the more at ease your guests will be and you will have a splendid time.

I made this tart for my recent dinner party entitled, “An Evening Celebration of Figs and Friends” where each course celebrated the spectacular fig. Especially this year, I have just been enamored by this jewel of a fruit. It is tasty, versatile and can work with either a sweet or savory dish. This particular tart almost has a cheesecake quality with the cream cheese element in the filling. The crust was buttery and crisp which was perfect with the creamy filling and rich fruit topping. You could certainly substitute the fig and apple for other fruit toppings such as pears with dates.

Would love to hear about your favorite tart that you enjoy.


Apple and Fig Tart


Crust:

12 T. Butter
1/2 C. Sugar
1 t. Vanilla
1 1/4 C. Four

Filling:

8 oz. Cream cheese, room temperature
¼ C. Sugar
1 Egg
1 t. Vanilla

Top:

2 Apples, peeled, cored, and thinly sliced
3 to 4 Figs, quartered
½ t. Cinnamon
¼ C. Sugar
¼ C. Slivered almonds

Preheat the oven to 400 degrees .

Make the crust: Cream the butter and sugar. Stir in the vanilla. Then, mix in the flour to make a smooth dough. Press into the bottom of an 9 - inch springform pan, giving it about a 1-inch rim. Bake 15 minute, or until lightly golden. Remove the tart shell from the oven.

Make the filling: beat together the cream cheese, sugar, egg and vanilla for the cream filling until smooth. Make the topping by tossing the apple slices with the cinnamon, sugar, and nuts. Cut the figs into quarter or eights.

Remove the tart shell from the oven. Spread over the cream mixture. Arrange the apple slices on top, and place the figs toward the center and swirl around and then scatter over the nuts. Bake until the apples are tender and golden, about 40 minutes.

Adapted from Laura Calder


Monday, October 4, 2010

Brown Sugar and Rosemary Cashews


Crunchy, salty and sweet all rolled up into one little nibble – now that is a bite of perfection. This is the ideal snack for sitting watching a football game or serving at your next cocktail party or simply an after work snack. Several years ago, one of my employees brought these to a potluck and I could not stop eating them. I inquired about the recipe and he quickly shot it over in an email. I have served these at many of my gatherings and typically people can’t stop eating them. I must say, they are addictive.

The original recipe is from Barefoot Contessa, who is one of my idols. I have since altered the recipe to add more richness of the butter and sweetness of the brown sugar along with more rosemary to add to the intenseness. It would be also wonderful on almonds if cashews are not your cup of tea.

If you had the opportunity to read my entry for challenge #3 of the Foodbuzz – Next Food Blog Star contest, then you might remember these were served as one of the appetizers. Trust me - the bowl was empty before we adjourned to the dining room for dinner. Just to let you know, the voting for round three is now open. You will have until 6PM Thursday October 7th to cast your vote (click here). If you enjoyed the post, I would appreciate your vote. Good luck to all of the other contestants!

Brown Sugar and Rosemary Cashews

1 pound dry roasted and salted cashews
2 T finely minced fresh rosemary (measure once minced)
1/4 t. cayenne pepper
2 T. dark brown sugar
1 t. kosher salt
2 T. melted butter

Preheat oven 375. Place nuts on a cookie sheet and bake for about 5 minutes. In a large glass bowl, combine the rosemary, cayenne, sugar, salt and melted butter. Stir together. Add warm cashews to mixture and toss until all cashews are covered and return to the cookie sheet and cook for 5 to 10 minutes until golden brown. Taste for seasoning and sprinkle with additional salt if desired. Store in an airtight container for best results.

Sunday, October 3, 2010

PFB #3 | An Evening Celebrating Figs & Friends


Entertaining is one of my true passions. The pure thought of planning an event in my head from who to invite to the menu to the details of designing the table, simply makes me happy. There is an art to entertaining that I have discovered over the years which makes it seem effortless to your guests and greatly reduces any stress for the hostess. I have threaded several of my entertaining tips throughout this blog post. Nothing gets my creative juices invigorated, than planning and hosting a dinner party. It is a fantastic reason to bring friends or family together to celebrate a season, event or simply celebrate each others company.


For the third challenge we were asked to host a Luxurious Dinner Party for at least four guests and be creative while sharing new tastes and entertaining secrets. While contemplating ideas in my mind about how I would execute this third challenge - I thought since we are officially in the fall season and it was the tail end of the magnificent fig season, I decided to go with the theme – “An Evening Celebrating Figs & Friends”. Often one small idea or item will trigger my creativity and then the details begin to explode from all angles. I have discovered that keys to a successful dinner party boil down to planning, paying attention to details and making your guests feel welcome and comfortable.


Speaking of guests, I put careful thought into who to invite for this special dinner, since I would have loved to invite everyone I know, but unfortunately that would not be practical. Of course, this would give me many reasons to host multiple future dinner parties for many of my wonderful friends. The invitation is often the sneak peek into type of party that your guests will be enjoying. With the vast popularity of social media and quickness, I sent a personalized invitation via the internet with the tone of the dinner party to my guests. Within a very short period of time, everyone was confirmed and now the excitement was mounting.


With any project that has a deadline, it is best to work backwards to develop your timelines and task list. Three words are the keys to creating a successful party – “Planning, Preparation and Presentation”. Several years ago I created my “Entertaining Worksheet” which keeps me extremely organized with planning the theme, menu, shopping list, preparing the menu items, getting the house ready along with myself. If I have at least one hour of downtime prior to my guests arrival, the checklist and planning was successful.


Planning, Preparation and Presentation Tips:

The Basics: Determine date, location, venue, number of guests and type of invitation. Include in the invitation the theme of the event along with hints how to dress if important.
Menus: Create a menu around your theme, number of guests and use a combination of prepared and ready made foods. Prepare menu’s to be placed at each place setting. Personalize with the guest’s names and date of the event. Your guests can take home as a memoir to the evening.
Variety and Preparation: Think about different colors and textures to your menu, so you have visual variety along with tastes. Prepare as much food ahead of time and store in reusable containers for ease of entertaining.  Then you need to simply assemble, heat or cook.
Checklist: Use your checklist to map out a timeline for purchasing your food and wine, selecting linens and dishes, preparing your house, picking music and leaving time for you to get ready and look fantastic.
Wine and Beverages: Chill wine the night before, have plenty of ice on hand for water and other beverages and create a signature cocktail to kick off the evenings festivities. 
Water tip: Fill the water glasses about twenty minutes prior to serving dinner and then use a big pitcher without ice to fill each glass. Add a slice of lemon or cucumber for extra punch.
Get ready: Empty the dishwasher and trash receptacle prior to the event.
“People eat with their eyes first” – Food should have “negative space” or empty space around it. Ensure various colors and textures are utilized.
Presentation: Ensure tablecloths are pressed and stain free. Use chargers or placemats for added dimension to the table. Select centerpieces that coincide with the theme of the party and are below the guest’s eye level.
Personalize: Be creative with place cards and mix up the seating arrangements to encourage conversation.
Table: Set the table the night before your event, add flowers the day of the event and light candles just before your guests arrive.
Music: Create cocktail party music along with dinner music on your ipod – helps to enhance the mood of your event.
Coffee: Have the coffee pot pre-loaded with beans and water, so all you need to do is press the button.


One part of this process that is my favorite is creating the menu along with the wines that will pair with the dishes. Incorporating figs into each aspect of the menu was both fun and challenging. I decided to use both the black mission and totato varietals of figs and incorporate them into the centerpieces along with the place card holders to further embody the theme.


A copy of the menu was placed in the entrance of our home to give my guests an opportunity to gain a glimpse into the evening. I carefully selected various wines that were already in our wine cellar which were both unique and would pair beautifully with the menu.

Use something that designates who owns the wine glasses, so there is not a question as to who it belongs to. I enjoy personalizing with each guest's name.


Going back ten years, I decided to create custom menus for my dinner parties and store them in a decorative binder to bring back the wonderful memories. For this dinner party, I created a pretty menu along with a tasting note card giving hints about each wine. It was a wonderful conversation starter for everyone to discuss the aromas and flavors they discovered with each wine. Especially with the Pinot Noir which had a distinct aroma of cola – after reading that detail each guest immediately recognized the hint of cola in the wine. Perhaps the power of suggestion made a difference.


For "An Evening Celebrating Figs & Friends", each course was carefully paired with a special wine to enhance the experience.


{ Rosemary and Brown Sugar Cashews + 2009 Vermentino -  Blair Fox Cellars}


{ Caramelized Onion, Fig, Blue Cheese Crostini + 2009 Vermentino - Blair Fox Cellars }


{Amuse Bouche - Grilled Figs with Bacon + 2006 Riesling - Bex }


{ Mixed Greens, Arugula, Fennel, Shaved Parmesan, Figs and Sherry Vinaigrette + 2007 L'Avion - Stolpman Vineyards }


{ Maple-Rosemary Brinded Pork Tenderloin, Port Infused Fig Chutney with Parsley Fingerling Potatoes + 2005 Pinot Noir - Hartley Ostini Hitching Post Highliner }


{Fig and Apple Tart + 2006 Far Niente "Dolce" Napa Valley Dessert Wine }

Amuse Bouche

An amuse-bouche is typically a one or two bite offering by the chef that offers a glimpse into the chef’s approach to cooking and often accompanied by a complementing wine. It is referred to sometimes as a chef’s surprise and adds that extra special touch to a dinner. With my theme, I found a recipe for Grilled Figs Wrapped with Bacon from The Vineyard Restaurant located in Madera California and paired with the Bex Riesling.

Grilled Figs Wrapped with Bacon

8 slices bacon, center cut
1 C. Balsamic vinegar
8 Fresh figs
8 Wooden skewers, soaked in water

Arrange bacon slices in a single layer on a baking pan and precook for 5 minutes at 400 degree oven. Meanwhile, measure the vinegar into a small saucepan; heat and simmer over medium heat until reduced by one half. Set aside.

Wrap each fig with one slice of bacon and secure with a skewer’ grill over open fire or on a grill pan till bacon is crisp. Drizzle vinegar reduction and serve warm.


Overall the evening was filled with great friends, much laughter and of course delicious food and wine. After we concluded with dessert, the evening was winding down and I wanted to give a little gift to each of my guests. Continuing with the fig theme, I presented each person with a jar of my handmade fig jam. With jam and menus in hand, we said good night to our fabulous guests and proceeded to relax and reminisce about the wonderful dinner party.


A special BIG thank you to everyone who voted for my challenge #2 post.  Challenge #3 - Creating and executing a Luxurious Dinner Party was extremely fun and rewarding.  Voting opens: 6AM pacific time October 4th through 6PM pacific time October 7th. 

Thursday, September 30, 2010

{ Pan Roasted Brussel Sprouts with Chiplote Aoili }


One of my absolute favorite vegetables is Brussel sprouts. Often I hear from folks that this is their least favorite. My least favorite would be broccoli – I know it is so good for you and the majority of people love it. Unfortunately, it is the one and only veggie that is not ever stepped foot into my house.

I remember when we were small, my younger cousin came over for dinner and my Mom had prepared Brussels sprouts for dinner. She looked at these as if she had never seen them before and indeed this was the first time she experienced them. She tasted it and then exclaimed that they looked like little heads of lettuce. We all still remember that dinner.

The recipe below is probably the most frequent way that I cook Brussel minus the aoili - that is a special treat. Although, a decadent way to enjoy these little gems is with bacon and instead of the olive oil, you cook in the bacon renderings. Then at the last minute you toss the Brussels with the crumbled bacon bits. Paula Deen would be proud!

Serves Four

Brussels sprouts

32 to 36 Brussel Sprouts
Olive Oil
Lawry’s season salt
Fresh ground pepper

Remove with a knife the bottom of each Brussel sprouts and then cut in half or quarters. In a large skillet add about ¼ to 1/3 cup olive oil and heat on medium. Add the Brussels and coat with the olive oil. Season with the salt and pepper. Continue to cook until golden brown. Serve along side the chipotle Aioli for dipping.

Chipotle Aioli

½ C. Mayonnaise
1 T. Chives, finely chopped
1 Garlic clove, finely minced
½ t. Lemon juice
1 large Adobo chili
Salt and pepper

Add all of the above ingredients into a food processor until smooth. Taste and adjust seasoning as desired. Place into a container with a lid and refrigerate until ready to use.

Sunday, September 26, 2010

PFB #2 | The Classics: Pho Ga - Vietnamese Chicken Noodle Soup }


First and foremost, I would like to extend a big heartfelt thank you to everyone who voted for me and helped me to advance to the second challenge of the Project Food Blog contest.  For the second challenge, we are asked to tackle a classic dish from another culture and go outside our comfort zone.  I chose to go to the other side of the world to the country of Vietnam and create my version of Pho Ga - Vietnamese Chicken Noodle Soup.  Voting opens on Monday, September 27th at 6Am through 6PM September 30th.  Please visit this link to learn more about Project Food Blog and cast your vote.

Vietnamese cuisine has a certain distinct mystique. It has long been admired for its freshness, simplicity with flavorful qualities and considered one of the healthiest cuisines. The dishes are artfully composed with an abundance of fresh herbs, greens, vegetables and are well-seasoned. Chinese, Thai and French influences are infused into this Vietnamese cuisine and bring uniqueness. Common ingredients include: ginger, spring onions, lemongrass, chilies, noodles, seafood, beef, chicken, mint, basil and even coconut milk.


One of the distinct differences with this cuisine is the Nuoc Mam or fish sauce. It is derived from anchovy and is spiced with a little chili, garlic, lemon juice and vinegar. The fish sauce provides the inimitable distinction from other Asian flavors.


For many years, I have enjoyed and admired this cuisine for the flavor profiles and the simplicity which appears to be complicated. A few months ago, I was dining with one of my employees for lunch at a local Vietnamese-French inspired restaurant. He decided to have the Pho Tai, which is a noodle soup with rare beef. Being adventurous, I ordered the identical item. When it arrived, I had no idea on how to eat it or what to do with the beautiful side dish of garnishes.

Quickly I learned that you first mix in the desired amount of sriracha and hoisin sauce to enrich the already flavorful broth. Once that is mixed, more flavor and texture is added to this amazing soup by topping with crispy bean sprouts, cilantro, jalapenos, basil and lime juice to add a touch of acidity. The beef is slowly cooked by the heat of the broth and you enjoy by using chop sticks and a spoon.


When I first read the ten challenges for the Food Blog Project, I began to jot down ideas that I would like to accomplish with each challenge. After reading challenge number two, “The Classics”, the idea came to me like a lightning bolt. After tasting the Pho Tai several months ago, I decided that I would tackle Pho Ga (Pho is pronounced ‘fuh’). Pho Ga is a delicious Vietnamese soup with chicken, loaded with spices, fresh herbs and rice noodles. The idea of this soup sounds simple, yet the taste is anything but. It embodies complex flavors with simple, healthy ingredients.


Many folks believe that Pho noodle soups originated in the 1920’s as a union of French-style cooking merged with local Vietnamese ingredients. If you ventured to Vietnam to the local food stalls, you would be guaranteed to smell the distinct flavors of the Pho noodles broth and see the locals hunched over enjoying a large bowl of Pho soup. This soup was customarily enjoyed for breakfast but today it is a round the clock treat. Typically, the broth takes 4 to 7 hours to prepare however, my style of cooking is much more simple and I went outside the box on this tradition.


To save time and put my own twist on this classic, I decided to use really good prepared chicken stock along with a rotisserie chicken. My husband had never enjoyed this Vietnamese delight, so I was even more excited to prepare this iconic dish. After adding the sauces and condiments to this flavorful soup, I took my first taste. I amazed myself and a feeling of such accomplishment ran through my head. I exclaimed to my husband – “I actually replicated the soup”.


I would like to personally thank each of you who voted for me in the first challenge and helped me to advance to the next round. Your support is greatly appreciated!

Pho Ga: Vietnamese Chicken Noodle Soup

Serves 4

12 Cups Chicken Stock
1 Large white onion
2 Medium pieces of fresh ginger
1 Rotisserie Chicken, 1 ½ cups shredded chicken
2 t. Salt
2 t. Sugar
2 T. Asian fish sauce
2 T. Whole coriander seeds
4 Whole cloves
3 Whole star anise
6 oz. Package dried rice noodles
8 oz. Bean sprouts
1 C. Cilantro leaves
1 C. Thai basil (regular basil can be used)
2 Limes cut into quarters
2 Jalapenos, thinly sliced
Sriracha sauce
Hoisin sauce

Broth:

Preheat oven to 400 degrees. Cut the onion into quarters, leaving the skin on and cut the ginger in half lengthwise. Lie onto a cookie sheet and bake in the oven for about 30 minutes. The onions should begin to char. Leave in an extra 10 minutes if more charring is desired.

In a large pot, add the chicken stock and put the burner on high. Add the charred onions and ginger along with the salt, sugar, coriander seeds, cloves and star anise. Let the broth come to a boil and reduce heat to low after it boils. Let simmer for another 30 minutes to develop the rich exotic flavors. After it has simmered for 30 minutes, then add the fish sauce. Keep the broth hot.

Noodles:

Soak the noodles in warm water for 15 minutes until pliable. Bring a large saucepan of salted water to a boil. Drain the noodles and add to the boiling water. Boil until tender for about 3 to 5 minutes. Drain well. Transfer to four large bowls.

Assemble:

Divide the shredded chicken among the four bowls. Prepare four plates with the accompaniments to add to the soup. This would include: basil leaves, cilantro leaves, 2 quarters of lime, bean sprouts, and jalapenos along with a small bowl with the sirachi and hoisin sauce for each person to add to the soup. You can provide a small spoon for your guest to allocate the desired amount of sauces. Let them know to squeeze the lime into the soup and add the condiments to have the full Pho Ga experience.