Friday, December 31, 2010

2010 "Foodie - flections"


It is hard to imagine that this is the last day of another decade. I can distinctly remember when it was 1999 and everyone was nervous about the clock striking midnight. Luckily it was a non-event for any type of negative incident. When the clock strikes that magical number “12:00” tonight, we enter into a new decade and year. During this time of year, everyone determines their resolutions, goals and aspirations for the coming year. Some are elaborate and others are simple. It is a time for reflection.

I am energized for 2011. By nature I am an optimistic person and see the glass half full versus half empty. Actually, I like to think that the glass is always full. I am certainly a realist but prefer to err on the side thinking positively. Life is very precious and my motto is to live each day to the fullest.

Many years ago I was hit by a drunk driver. Broke both my legs, almost died, spend two months in the hospital and the crash put me behind graduating college in the typical four year timeframe. (took five years) Needless to say, it was a life changing experience. However, I managed to see the positive side and knew there was more for me to accomplish on this earth. I share that experience as an insight into why I value each and every day.

This year I put energy into my enthusiasm for food, wine and entertaining and sharing my passion through blogging. Blogging provides a platform to document and memorialize your recipes. However, I soon discovered that food blogging is more rewarding, complex, fun, challenging and interesting than originally thought. Through blogging, I have met wonderful new friends, realized a new hobby of photography, improved my writing abilities and tried a lot of new recipes.

For 2011 my objectives are straightforward, uncomplicated and clear-cut. Thought I would share a few with all of you:
  • Live each day to the fullest
  • Cherish my husband, family and friends
  • Leave each day of work knowing I did my absolute best
  • Continue to share my passion for food, wine and entertaining
  • Learn new things, travel new places and meet new people
  • Be positive and live life
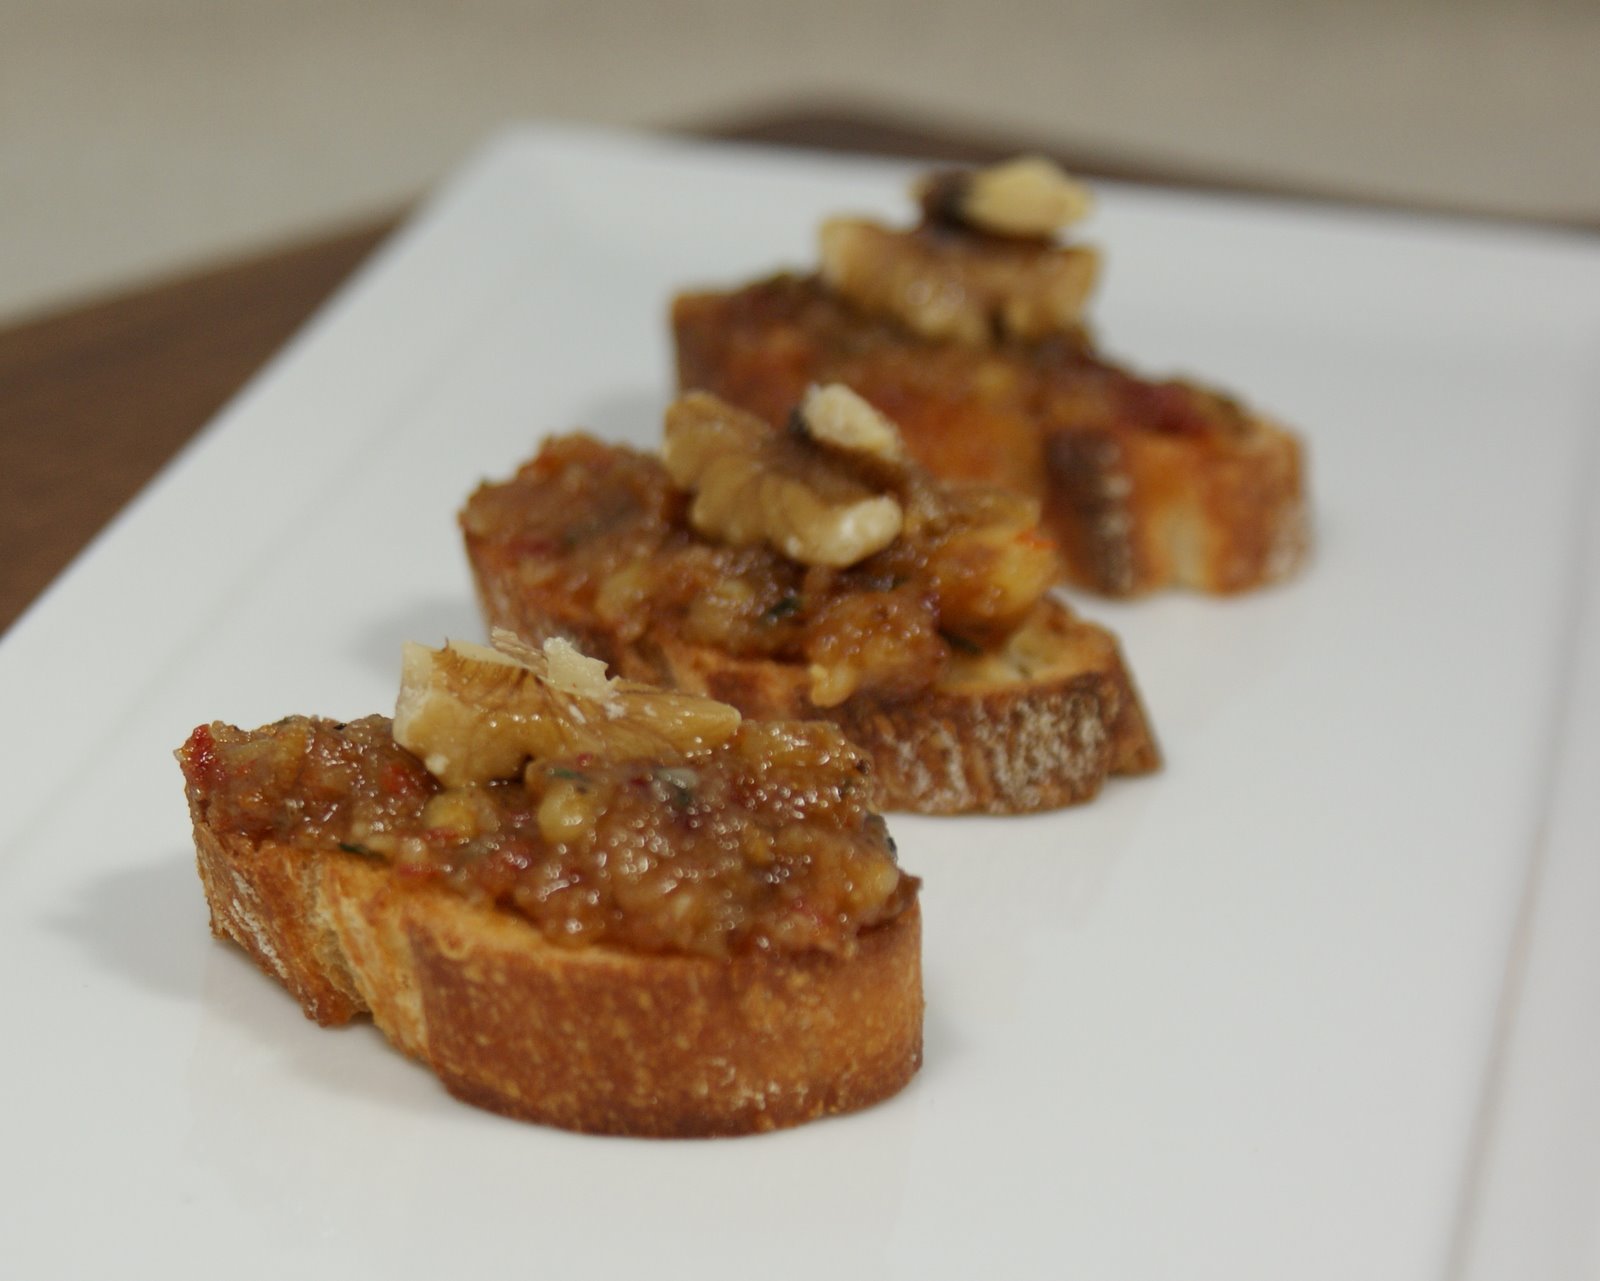
In the spirit of reflecting on 2010, I wanted to share my top ten foodie posts with all of you. I am aptly titling my List – “2010 Foodie – flections”:

Friends and Figs


One of the highlights for me was entering the FoodBuzz Project Food Blog contest. It pushed me out of my comfort zone, taught me things about myself, connected me with great new friends and honed my blogging skills (much more to learn in 2011). Being in my element, challenge number three, throwing a luxury dinner party, was by far my favorite.


Pizza Remix


What a fun challenge which helped to showcase my creativity while making some delicious pizza flavors for my husband to enjoy in between photo shoots.

Mini Red Velvet Cupcakes


I am fascinated by small bites, so why not make dessert tiny too. After having my new camera for just a short time, I was still in testing mode but happened to have one of those “money shots”. It was my first prelude to being showcased on Foodgawker and being honored with a Foodbuzz Top 9. It was a good day!

Caprese Bites


Appetizers are one of my obsessions. Given a choice between a bowl of pasta or several small plates of appetizers – the appetizers win hands down. My goal was to put a twist on the standard caprese bite and kick it up.

Fig Jam Pockets


These little gems were noted by husband to be one of the BEST cookies I have ever made. Now that is a great compliment.

Shaved Brussels Sprout with Truffle Oil Crostini


During the month of December I have made this crostini for three different parties and each time, I still absolutely love it. Guests are surprised when I tell them it is Brussels sprouts.

Fried Green Tomatoes


On my bucket list is to visit several states in the south, so until I get there, I wanted to recreate a bit of the south in my own kitchen. This recipe is a keeper.

Grapefruit Marmalade


In 2010, canning became quite an obsession. Both the process and the end product are rewarding. It brings me much joy to give these little gems to friends and family. The smile it brings to each person is priceless. That is my reward!

Pecan Cheddar Gougeres


Give me a savory treat any day over a sweet treat. Like a popover, I could easily eat 3 to 4 of these in one sitting. Note to self: only make a few times a year if possible.

Apple Fritter Poppers


One of life’s simple pleasures is something fried. It is not good for our health or waistline, but in moderation, not such a bad thing. My husband has quite an affinity for apple fritters, so I created a mini version for him to enjoy.

May each of you have a healthy, happy and prosperous New Year.
Cherish each moment!


Thursday, December 23, 2010

Grapefruit Marmalade


2010 has been the year of canning for me. There is something quite therapeutic, relaxing, satisfying and rewarding about canning. I believe it is the entire process of choosing the recipe, cooking and placing the sealed jars in the large pot of boiling water to preserve.


I began my canning journey in May with my very first project – Spicy Dill Pickles. I was inspired by my friends Robin and her husband Tracy who can 100 jars of pickles each summer. Can you believe it! I was fortunate enough to have them give us a jar of this prized family recipe last December as a hostess gift during the annual ornament exchange party. When we finally opened them, both Charles and I were just amazed at how delicious they were.


Robin and Tracy were not parting with this secret recipe, so I ventured to create my own after researching for quite sometime. The result was a very spicy pickle that for my first attempt, I was quite pleased. Now that I conquered by first canning experience with flying colors, I have not stopped.


Just a few of the things I have created thus far are: Balsamic Fig Jam, Peach Chutney, Cranberry Orange Ginger Chutney, Spicy Green Beans, Pickled Garlic Brussels Sprouts, Pomegranate Jelly, Cranberry Pepper Jelly, Strawberry Rhubarb Jam, Peach Rhubarb Jam, Cranberry Fig Chutney, Marinated Mushrooms and the latest creation was Grapefruit Marmalade.


Marmalade reminds me of vacationing in London. It is enjoyed with toast, scones and other baked treats. One of my favorite things to do in London is to have Afternoon Tea or High Tea. Two of my favorite spots in London are: Browns Hotel and The Savoy. My husband and I first had high tea at Browns on our honeymoon. The experience is the complete epitome of English tea. The room is very authentic with big chairs, dark wood and pretty china cups abounding everywhere. Most everyone in there were English and very proper. We enjoyed the entire experience. I must admit that the Savoy had the BEST scones I have ever had in my life. Not sure how they made them, but they were simply divine.


A couple years ago, I purchased “Jellies, Jams and Chutneys” written by Thane Prince. Thane owns her own cooking school in Suffolk, England called The Aldeburgh School. I am sure that she has had her share of high tea. One of the recipes in the book that caught my eye was the Pink Grapefruit Marmalade. Traditionally you will see orange marmalade. This twist was intriguing and I was up for the challenge. I did make a triple batch and hand cut each rind of grapefruit. Now that is a large task. Since I am on vacation through the end of the year, I have time and thought this would be a great way to enjoy myself, especially since it is rainy outside.

If you are a marmalade fan, you will completely enjoy this sweet and tangy spread over toast, a scone or a toasted slice of baguette.

Pink Grapefruit Marmalade

Ingredients

3 pink or red fleshed grapefruits
2 large lemons scrubbed
3lbs white granulated sugar

Cut the fruit in half and squeeze out all the juice and strain in to a large bowl.

Using a sharp knife, cut the shells of the grapefruit and lemons into fine shreds and put these in a large glass bowl and cover with 6 cups of boiling water and leave to soak for 2 hours.

Put the fruit and water into a large pan with the reserved juices. Bring to the boil and simmer for 60 minutes until the peel is very soft. You should be able to cut it easily with a wooden spoon.

Stir in the sugar and simmer over a low heat until it has dissolved. If any scum rises the surface, skim it off. You may need to do this several times. Now increase the heat and cook at a full rolling boil for 20-30 minutes and then test for a set. May take a bit longer.

When the marmalade has reached the setting point, let it stand for 5 minutes, then ladle into hot sterilized jars, seal and process in water bath for 10 minutes.

Makes about 7 half pint jars.


Thursday, December 16, 2010

Walnut and Pinenut Pesto Crostini


It is suppose to rain here in the Bay Area for the next week and everyone is getting ready.  I know that other parts of the country have much more severe weather and we are so fortunate to have the mild seasons.  Rainy weather is synonymous with comfort food.  Not just Mac and Cheese and mashed potatoes, but food that makes you really happy.  Appetizers make me happy. 


The holidays are filled with a lot of cocktail parties and other gatherings.  If you are like me, abundant finger foods is the best way to eat during the holidays.  Many nibbles, tastes, textures and flavors make me happy. This appetizer is a tried and true hit at every party I have thrown.  You can either serve them on a platter all prepared or simply serve the pesto in a decorative bowl with toasted crostini along side, so your guests can serve themselves.  The beauty is it is a make ahead appetizer.


Tomorrow is my last day of work for sixteen days.  Can you tell that I am excited to take some time off by the exact number of days, not just two weeks.  I love taking time off during this time of year and have many fun things already planned.  There will be a lot of entertaining going on and I promise to share with all of you.  Happy Holidays!!

Walnut and Pinenut Pesto Crostini

¾ C. walnuts, shelled
¼ C. Pine nuts
1/4 C. grated Parmesan cheese
1 small garlic clove, peeled and crushed
4 sprigs of thyme, just leaves
Sea Salt
½ t. sherry vinegar
1/3 C. extra virgin olive oil
2 tablespoons minced sun-dried tomatoes, packed in oil
1 Baguette, sliced

Extra: 24 walnut halves – decorate the top of each crostini

In food processor, coarsely grind walnuts, pine nuts, parmesan cheese, garlic, thyme leaves, salt and vinegar. Then add in oil and tomatoes.

Cut baguette into half inch slices. Brush each side with olive oil and toast bread. Top each slice with a heaping teaspoon of pesto. Top each one with a half of walnut.

(Adapted from Jody Williams at Gottino in New York and Smitten Kitchen)


Monday, December 13, 2010

Buttercream Sandwich Cookie


What do the holidays mean to you? This can be a simple or complex answer depending on your own personal experiences.

To me, the holidays are magical. The air has a certain mystique all around. Whether it is the scent of pine or cinnamon, or fresh baked holiday cookie or roast beef with fresh popovers baking in the oven, the scents to me are enchanting. Often either particular scents or songs will transport you right back to a time in your life. Not quite sure why it is such a common phenomenon.


There is a radio station in the Bay Area that begins to play all of the cherished holiday songs round the clock during Thanksgiving Day weekend. My husband and I completely enjoy listening and the music certainly enhances the holiday season. Along with the music, baking cookies is synonymous with the Holiday Season. This tradition is fervently anticipated by avid bakers around the world. The only negative, is the immense amount of time it takes to make an abundance of assorted cookies. The solution to this daunting task is to host a Holiday Cookie Exchange with friends and family.


When hosting a cookie exchange party, you invite friends and family who share the same passion for baking cookies. "Cookie" is a loose term for the exchange since you can include confections and other festive sweets to create variety. English toffee, fudge, divinity and bark are all delicious additions to the cookie exchange.


Holiday Cookie Exchange Tips

Plan ahead! Set the date at least 4 weeks prior to prevent last-minute cancellations. Send traditional invitations or use Evite. Note on the invitation to bring plastic storage bags or containers to transport cookies back home.

Decide on how many dozen cookies you will ask each guest to bring, plus a dozen for the party. In addition, ask each guest to call or email you with their cookie choice, so there are not repeats. Two dozen is a good benchmark number to consider.

Request that each person bring copies of their recipe to share with all of the attendees. Provide folders with each guests name on the front as a nice touch for them to put the recipes. You can decorate in a holiday theme or with a photo of the cookie each person brought. Use a Polaroid camera to take a photo before they leave and adhere with photo corners on the outside of the folder.


Prepare a large table or kitchen island for everyone to set out their cookies. Spread a festive cloth on the table and decorate with your favorite holiday items. Provide a festive plate on the table for each guest to place their contributions. Place an extra platter on the table for the cookies that will be enjoyed during the party.

Create a festive holiday play list from i-tunes and play throughout the gathering.

A cookie exchange can be held any time of the day. Mornings or evenings are a wonderful time during the holiday season. Your guests will have the remainder of the day for other holiday activities such as shopping, wrapping, their own decorating, or other parties.

Plan to serve refreshments that can be prepared in advance and merely reheated at the party. You want to focus on your guests and keeping the exchange flowing. A simple brunch in the morning is perfect and assorted appetizers for an evening event.


Serve at least one holiday beverage such as egg nog or hot mulled cider along with coffee, tea, juices and, of course, milk. Evening events could include a signature holiday cocktail or wine. Try a Pomegranate Martini!

Come prepared with several containers to transport your treasured treats home.  The re-usable plastic containers by Glad or Ziplock are just perfect.  Light and easy to use.

A Twist: If you are going to have a small group (less than 6), you can have a cooking baking day. A true extravaganza! If everyone is enjoys the art of baking, chatting and spending time together, this is a terrific way to do a cookie exchange. Each person brings 2 to 3 different prepared cookie doughs. Make sure you have enough cookie sheets or ask your guests to bring extras. Ask your guests to bring anything special needed for baking or prepping, to ensure a smooth day. I suggest starting at 9am in the morning, since this will be an all day affair. Once the cookies are baked, divide among the participants!

The butter cream sandwich cookie is a perfect addition to your holiday cookie exchange. It is simple to make, has just a few ingredients and will impress with its beauty and decadent flavor.

Butter Cream Sandwich Cookie
(Adapted from Betty Crocker)

Cookie:

2 cups all-purpose flour
1 cup unsalted butter, softened
1/3 cup heavy whipping cream
1 t. Vanilla
½ t. Salt
Decorating sugar

Filling:

3/4 cup powdered sugar
1/4 cup unsalted butter, softened
1 teaspoon vanilla
Food color

Directions:

In medium bowl, mix flour, 1 cup butter and the whipping cream. Divide dough into thirds and wrap each portion in plastic wrap. Refrigerate about 1 hour or until firm.

Heat oven to 375º degrees F. Line 2 baking sheets with parchment paper or silpat. On a lightly floured surface, roll one-third of dough at a time 1/8 inch thick on lightly floured surface. (Keep remaining dough refrigerated until ready to roll.) Cut into desired shapes with 1 1/2-inch cookie cutters. Sprinkle each one with decorator sugar. Place on prepared baking sheet. Prick each cutout with fork about 4 times.

Bake 7 to 9 minutes or just until set but not brown. Remove from cookie sheet to wire rack. Cool completely, about 1 hour.

To make cream filling, mix powdered sugar, butter, and extract until smooth. Add food coloring if desired. Spread with a knife on the cookie or transfer filling to a disposable decorating bag attached with a decorating tip. Pipe filling between bottoms of pairs of cookies.


Saturday, December 11, 2010

Walnut, Medjool Date and Honey Crostini


Begin your next dinner or cocktail party with a simple yet elegant appetizer. The Walnut, Medjool Date and Honey Crostini is crunchy, sweet, savory and textural. It has basic elements woven together to create a one to two bite delight that will pair perfectly with a tall, slender glass of bubbly champagne. Dry or brut champagne would be perfect to balance the sweetness of the honey and caramel undertones of the medjool date.


The crown jewel of dates has to be the Medjool date. Deep amber brown color and the slight wrinkled outer layer makes these delectable treats stand up and shout – “deliciousness”. With Middle Eastern roots, these dried delights can be enjoyed in both savory and sweet dishes.


Whether you wrap these in bacon and bake to form what I call – Bacon Candy, add to a salad or simply garnish your next cheese platter – I would run not walk to your local market and pick some up today. Trader Joe’s is my “go to” stop to pick up a carton.


With last weekend’s holiday party now a wonderful memory, I thought I would share a simple recipe for this wonderful crostini. To me, a crostini is merely a canvass to top with your favorite winning combination of flavors. Pursuing through the online version of Fine Cooking, I came across a recipe for Crostini with Brie Dates and Toasted Walnuts. I adapted it a bit to make it my own. It was a complete hit with my guests and hope it will be perfect for your next party.

Walnut, Medjool Date and Honey Crostini

1 Sourdough baguette, sliced into 1/2-inch rounds (about 24 slices)
2 T. Olive oil
Salt
½ C. coarsely chopped toasted walnuts
½ C. Medjool dates, pitted and coarsely chopped
1 T. Honey
1 T. Balsamic vinegar
6 oz. Brie, rind trimmed and softened to room temperature

Position a rack in the center of the oven and heat the oven to 425°F. Set the bread slices on a large baking sheet; brush both sides with the oil and sprinkle one side lightly with salt. Bake until the bread starts to brown and crisp, about 8 minutes. Meanwhile, in a medium bowl, toss the walnuts with the dates, honey, and vinegar.

Spread with brie and then top with the date and nut mixture.

Wednesday, December 8, 2010

Almond Roca Cheesecake


Like many of you out there, the holiday season is one of the favorite times of the year. There is a certain crispness in the air here in the Bay Area along with beautifully decorated stores, restaurants and city streets. A bit of magic is indeed. Traditions abound at this time of year. Not quite sure of the exact number of years that a wonderful group of my friends and I have been having our annual ornament exchange party, but it is something that we all look forward to.


We typically take turns hosting at the various houses. This year was quite busy for many, so I volunteered to host. Since I love to entertain, it was really not a burden at all, in fact I was quite pleased to host two years in a row.


{We are a "shoe free" house like Martha Stewart}

We divide among the group who will bring appetizers and desserts. This way we can exchange new recipes, have variety and it lessens the stress level for the host. In addition, each person graciously brings a favorite bottle of wine to enjoy.


In my previous post, I highlighted my chosen signature drink for the evening – The Ginger Martini. Bring out your inner Mixologist the next time you throw a party and choose a signature cocktail to impress your guests. You add a bit flair and fun to your event.


I have known all of the guests for a good number of years. Even though we do not see each other as often as we would like, it feels like no time passed when we do get together. Time just seems to propel faster and faster each year. I believe that we need to enjoy every moment we have, appreciate everyday and know that friends and family are such important components to our lives.


The ornament exchange portion of the party is really fun.  Each person really takes pride in their selection of an ornament.  We draw numbers to determine the order.  Stealing an ornament creates the "fun" part and is frozen after the third steal.  Numbers in the middle tend to have a good selection however, if you are a strategic couple, you can form an a partnership to aquire your desired ornament. Some strategy, but mostly just plain fun.


Over the years, I have challenged myself to perfect the art of making cheesecake. Finally, I found the right balance of ingredients. This core cheesecake recipe is perfect for adapting, by changing the crust and topping ingredients.


Ever since being a kid, Almond Roca has been a favorite sweet, so I thought - let’s add to the cheesecake. To marry with the Almond Roca, a perfect compliment would be those thin, delicious almond cookies. You can find them at Trader Joe’s or your local supermarket. With the final touch of the homemade caramel, it is slice of heaven on a plate.


Almond Roca Cheesecake

At least 2 hours before you begin, set the cream cheese, eggs, and sour cream on your kitchen counter because it’s essential that the ingredients be at room temperature before you mix the batter.

Almond Cookie Crust

3 C. Almond cookies, finely ground
1/2 cup granulated sugar
10 T. unsalted butter, melted


Position a rack in the center of the oven and heat the oven to 350°F. Use a food processor to ground the almond cookies. In a medium bowl, combine the almond cookie crumbs and sugar. Stir in the 10 Tbs. melted butter until the crumbs are evenly moistened. Place a piece of parchment paper on the bottom of the pan before putting the crust in. This will enable you to slice the finished product from the bottom and transfer to a plate of your choice. Dump the crumbs into a 9-inch springform pan that’s about 2-1/2 inches deep and press them firmly into the bottom and about halfway up the sides. Bake until the crust is fragrant and warm to the touch, 5 to 7 minutes. Let the pan cool on a rack while you prepare the cheesecake batter.

Cheesecake

4 (8-oz.) packages cream cheese, at room temperature
2/3 C. granulated sugar
2/3 C. brown sugar
1 1/2 t. Cornstarch
4 large eggs, at room temperature
3/4 C. sour cream, at room temperature
2 T. fresh lemon juice
1 t. vanilla extract

Using your kitchen aide mixer or equivalent, beat the cream cheese with the sugar at medium-low speed until the mixture is smooth and somewhat fluffy, approximately 2 minutes. Scrape the bowl. Beat in the cornstarch. Beat in the eggs on low speed, one at a time, mixing the batter for only 15 to 20 seconds after each egg is added, just until it’s incorporated, and scraping the bowl each time. Don’t over beat. Add the sour cream, lemon juice, and vanilla. Beat at low speed until well combined.

Baking the cheesecake

Wrap the outside of the pan tightly with two sheets of extra-wide heavy-duty aluminum foil to make the pan waterproof. Pour the batter into the prepared crust; it should cover the crust completely and come to within about 1/2 inch of the pan’s rim. Place the springform pan in a roasting pan and carefully pour hot water into the roasting pan until the water reaches halfway up the sides of the springform pan. Bake at 350°F, until the top of the cake is golden brown and the center only has a slight jiggle, about 1 hour 10 min. to 1 hour 15 minutes.

Let the cake cool

Remove the cheesecake pan from the water bath, remove the foil wrapping and set the pan on a wire rack. Let the cake cool on the rack until barely warm. Refrigerate uncovered for at least 8 hours or overnight. The cheesecake will firm up during chilling.

Caramel Sauce

1 ½ C. sugar
¼ C. water
½ t. lemon juice
1 C. heavy cream

Stir sugar, water and lemon juice in a large saucepan over medium heat until the sugar dissolves. Increase the heat; boil without stirring until the mixture turns deep amber brown. This should take about 9 minutes. Take off the stove and hold over the sink before pouring the cream mixture into the sugar mixture. It will boil and bubble. Once calmed down, add to back to the burner and reduce slightly over medium low heat for about 8 minutes. Chill until thickened. Put into another container and slightly heat when ready to use.


Serve the cheesecake

Unclasp and remove the side of the springform pan, and then use a wide spatula to transfer the cake to a serving plate. Add the Almond Roca around the top of the cheesecake and push down slightly. The caramel should be slightly warm to spread on the top and just touch the Almond Roca pieces. Put back in the refrigerator for 10 to 15 minutes to firm up the caramel. Then slice with a warm knife for clean sliced and run under hot water as needed.


Sunday, December 5, 2010

Ginger Zen Martini


“Shaken, not stirred” is the well known catch phrase from James Bond and his preference for how he liked his martini prepared. Whatever method you prefer, a good martini is hard to beat.


Last night we hosted our annual ornament exchange party at our house. Not sure exactly how long we have had this traditional event. Each year this is the party that kicks off the holiday party season. In years past it has been a very large event which has leveled to a much more intimate group. Smaller venues are much more enjoyable in my opinion since it gives you the time to visit with each person and truly catch up.


I adore the idea of creating a signature cocktail for a party in addition to serving wine and other beverages. Last night was no exception. The Walnut Creek Yacht Club serves a Zentini which they have been quite infamous for. It is a blend of ginger simple syrup, mint, and lime and of course vodka. The marriage of these flavors is absolutely magical.


My friend Helen’s husband Phil, is one heck of a great bartender. Knowing that he would have that special touch for making the Ginger Martini, I asked him if would be the mixologist for the evening and he graciously obliged. About half the guests indulged into this adult libation and experienced this down right delightful concoction.


Even if you are not a martini drinker, you might want to give this a try. You just might convert over. If you do love martinis, I hope this quickly becomes your next favorite cocktail.

Ginger Martini
1 ½ ounces vodka (Grey Goose)
½ ounce Ginger syrup
3 to 4 Mint leaves
½ Lime, cut into 4 small cubes

Add all of the above ingredients to a martini shaker with ½ cup crushed ice. Using a muddler, break down the mint and lime. Then shake the ingredients together and pour through the strainer portion of the shaker into a chilled glass.

Ginger Syrup

2 C. Water
2 C. Sugar
1 - 2 large ginger root, cut into one inch pieces

In a small saucepan add the water and sugar. Bring to boil while stirring a few times. Reduce to a simmer and add the ginger. Let cook for about one hour. When ready, strain and transfer to a glass container and allow to cool to room temperature.

Friday, December 3, 2010

Pumpkin Biscuits


Not sure what it is, but I am a bit obsessed with biscuits. Could it be the flaky buttery layers? The crispy bottom? The rich satisfying taste? Actually I think that it is all of the above.


Typically I make the traditional biscuits and serve warm with butter or honey. For this festive holiday season, I wanted to bring it up a notch by making pumpkin biscuits. Did not want them too sweet since I wanted to keep the integrity of a true biscuit without being a scone.


I actually brought these to Thanksgiving Day dinner with Strawberry-Rhubarb Jam that I had made and canned during the summer. The combination was really tasty.


I am hosting our annual Holiday Ornament exchange party at our house tomorrow night and currently baking a Caramel and Almond Roca Cheesecake for the dessert for the party. Of course, I will post the recipe. This is one of those too die for desserts. Off to the kitchen I go and finish prepping for tomorrow’s fun party!


Pumpkin Biscuits

2 C. Flour
2 ½ t. baking powder
½ t. Cinnamon
¼ t. All spice
½ t. Ground ginger
¼ t. Nutmeg
½ t. salt
5 T. chilled butter, cut into small pieces
1/3 C. Buttermilk
3/4 C. Canned pumpkin
3 T. honey
Egg wash – 1 egg + 1 tablespoon of water

Preheat oven to 400°.

Combine flour, baking powder, spices, and salt in a large bowl; cut in butter with a pastry blender until mixture resembles coarse meal.

Combine buttermilk and honey, stirring with a whisk until well blended; add canned pumpkin. Add buttermilk mixture to flour mixture; stir just until moist.

Turn dough out onto a lightly floured surface; knead lightly 3 to 5 times. Flatten dough with your hands until it is about 1 inch thick and dust top of dough with flour. Cut dough with a 2-inch biscuit cutter to form rounds. Re-roll dough and cut remaining circles until all the dough is gone. Place dough rounds, 1 inch apart, on a baking sheet lined with parchment paper or silpat. Brush the top of each biscuit with the egg wash. Bake at 400° for 14 minutes or until golden. Remove from pan; cool 2 minutes on wire racks. Serve warm.